I faced a technical problem for a few days with the server.
It was impossible to create a new user or to change a password.
It should be OK now.
Thank you for your understanding.
With more than 1600 patterns in the gallery, it may be a bit challenging to find a pattern. I was asked to add a filter to the gallery.
You can now find a “Filter” button in the galleries
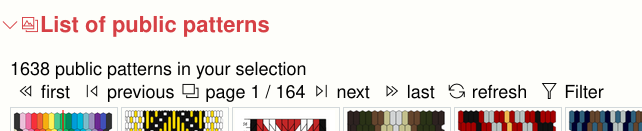
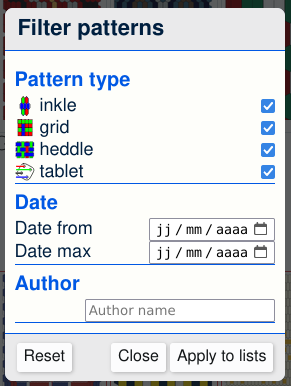
You can filter patterns by type, date and author.
I also changed user registration. Before, new users had to go to the blog to create an account. Now everything is done directly in SeiZenn.
On the “login page” in SeiZenn, there are now two links.
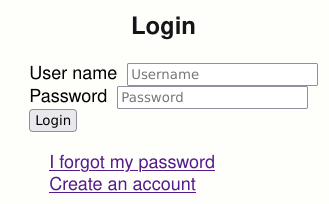
To create an account you just need to type in a username and your email.
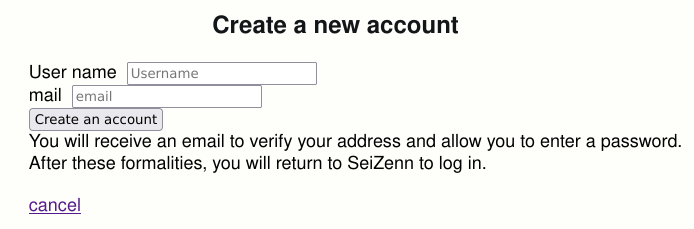
If you lost your password, you can get a new one. Just type in your mail address and you will receive an email with a link to create a new password.

Hi
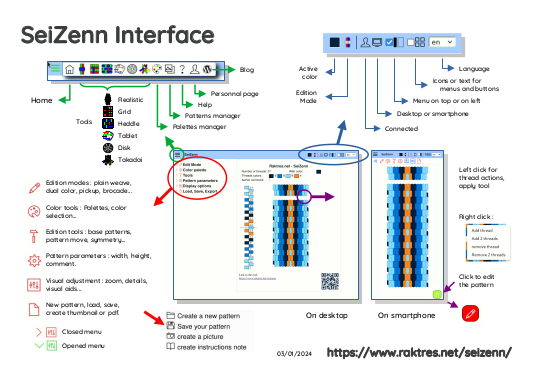
I was asked for simple instructions for beginners. I began with two short introduction sheets.
The first one is a presentation of the interface :
The second one is a basic reminder to create a very first pattern with SeiZenn.
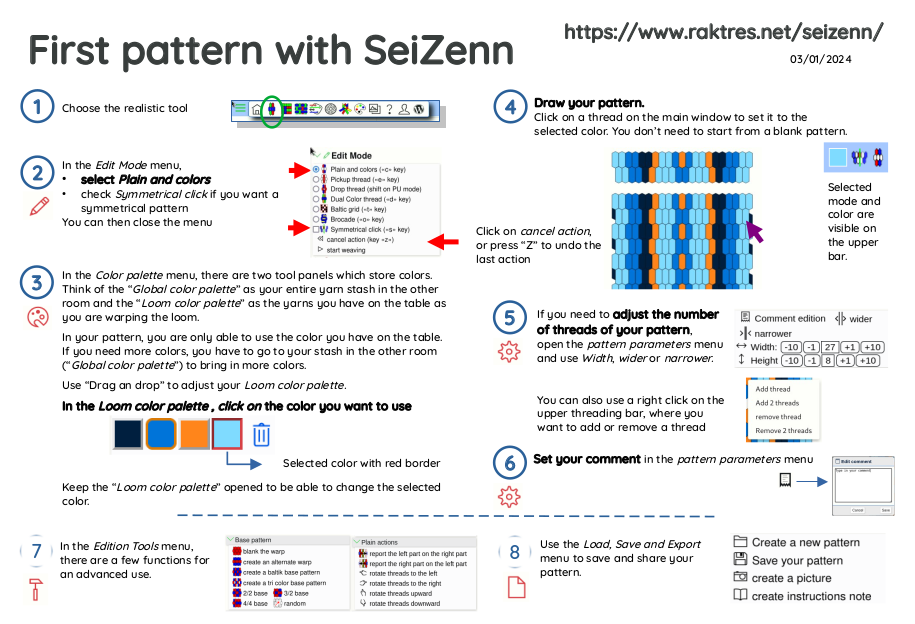
I took some elements from Instructions for using V1 Seizenn by Annie MacHale
Hi
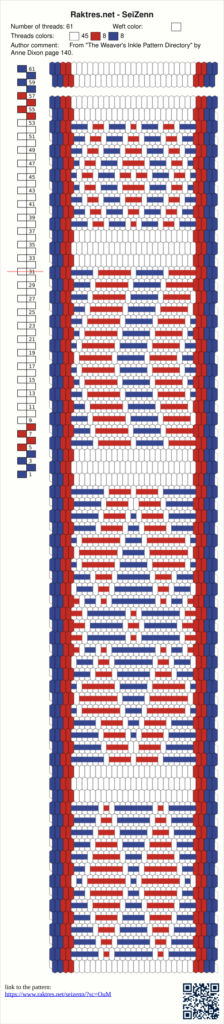
For Christmas, I received “The weaver’s Inkle Pattern Directory” by Anne Dixon. In this great book, she presents lot of different technics.
Many patterns from this book can be reproduced with SeiZenn. One of the last add is krokbragd button :
Some technics would be very difficult to add to SeiZenn, and for, I think, a limited benefit. For example fringes (page 154) or pleating (page 130).
I thought it could be interesting to add an inlay mode to create brocade (page 138).
With this mode selected, you just click on the pattern to draw brocade pattern 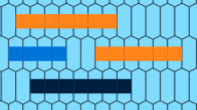
It comes with a few tools : 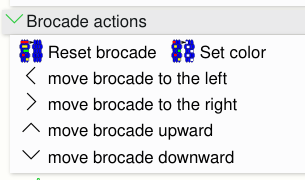
 =>
=> 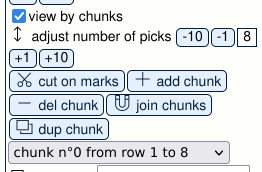
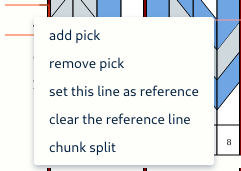
A pattern can be cut into chunks :

Hi
A few improvement for the SeiZenn inkle tool.
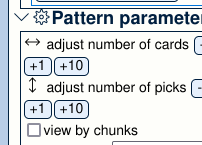
I was asked about the possibility of adding a thread inside a pattern. Until now it was only possible to add new threads to the right of the pattern with “width” parameter

So we had to play with the buttons 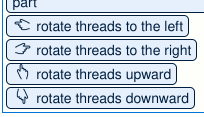
to be able to add the thread in the right place.
It is now possible to right-click to add or remove one or two threads where you want in the pattern.
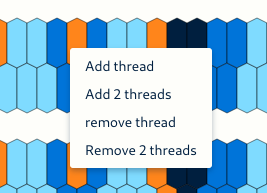
This function takes into account the “symetry” option.
Joan Sheridan explains in this video (https://www.youtube.com/watch?v=xtAxaL0S8BU) how to do turned Krokbragd on the inkle loom.
That kind of pattern can be done in SeiZenn with duals
![]()
I added some functions to make it easier to create this type of pattern. From a pattern,
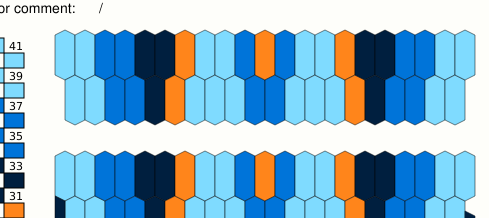
add a double color on the bottom row with “dual half threads” button
we obtain (it uses the selected color for all the duals) :

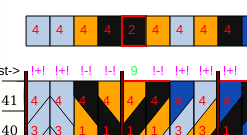
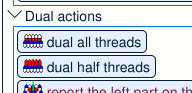
You must then indicate that you use the double color every other row. Rather than doing it by hand by clicking on the lines concerned, you can use
![]()
We obtain
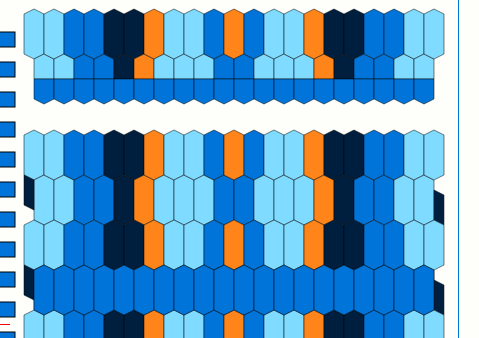
You can then adjust dual colors as you like
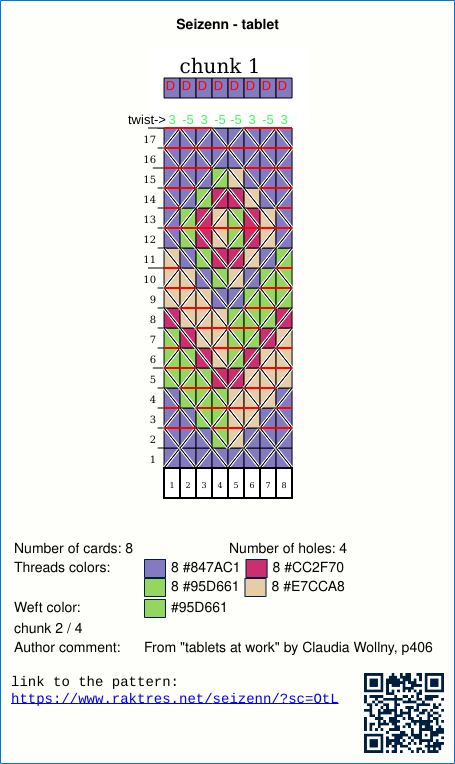
I slightly improved the function for generating a threading document which was accessible with the button “create instruction note” in the “load, save, export” menu ![]()
Now this button generates a PDF document.
(in this example, you need to verify the grid start and end values to be able to see the grid view)
Jeff
Hi
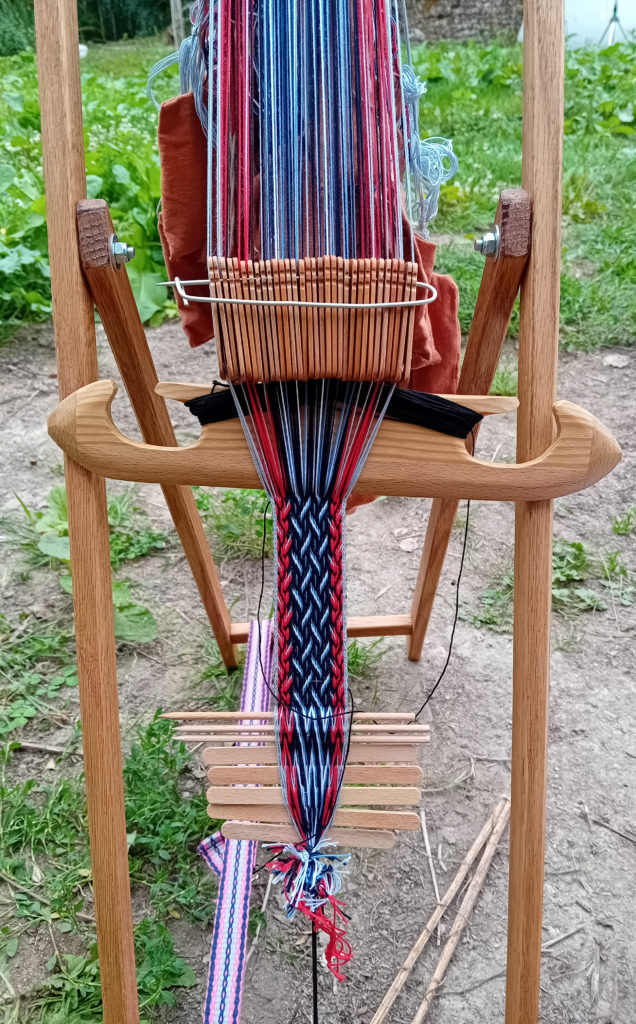
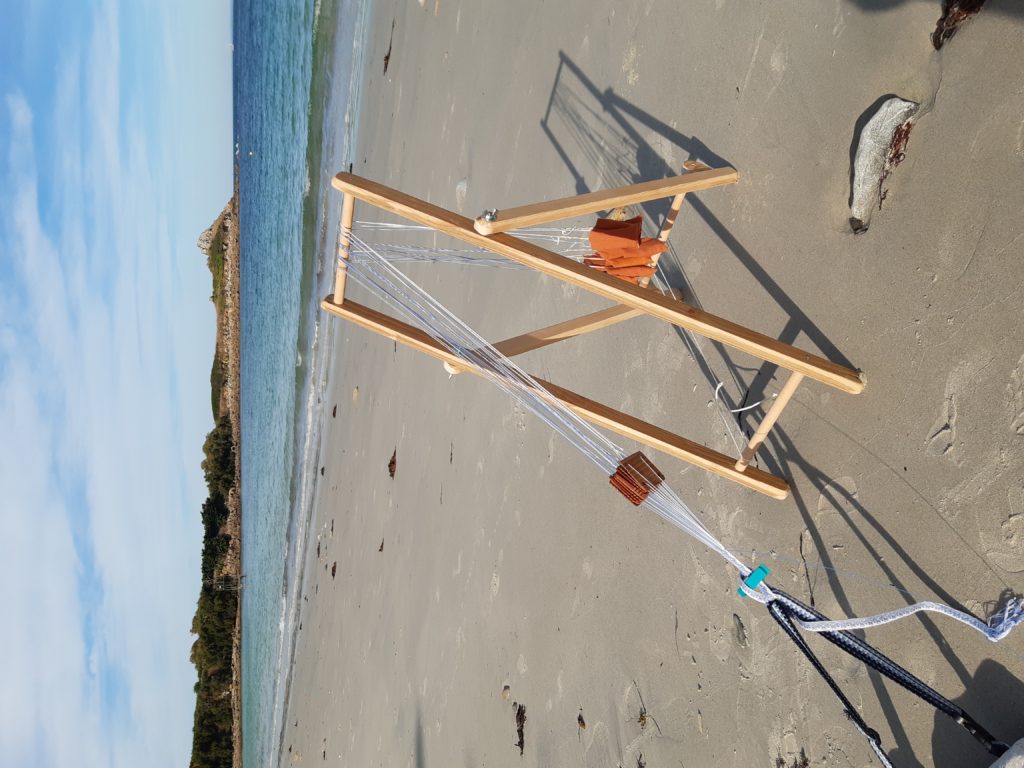
during summer I built two new looms.
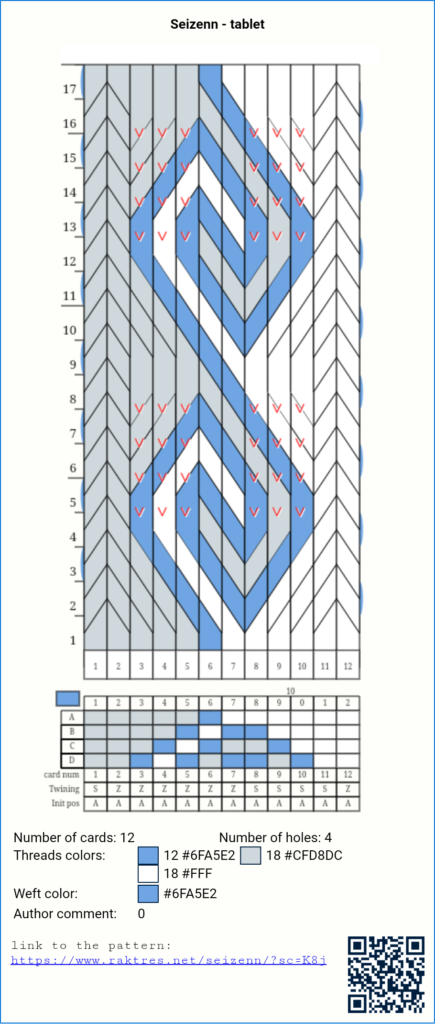
First, a new stand for tablet weaving. It looks like the one on page https://www.raktres.net/blog/2022/08/10/tissage-aux-cartes/
The second is a bit more complex. It is a vertical loom with 4-shaft for baltic bands.
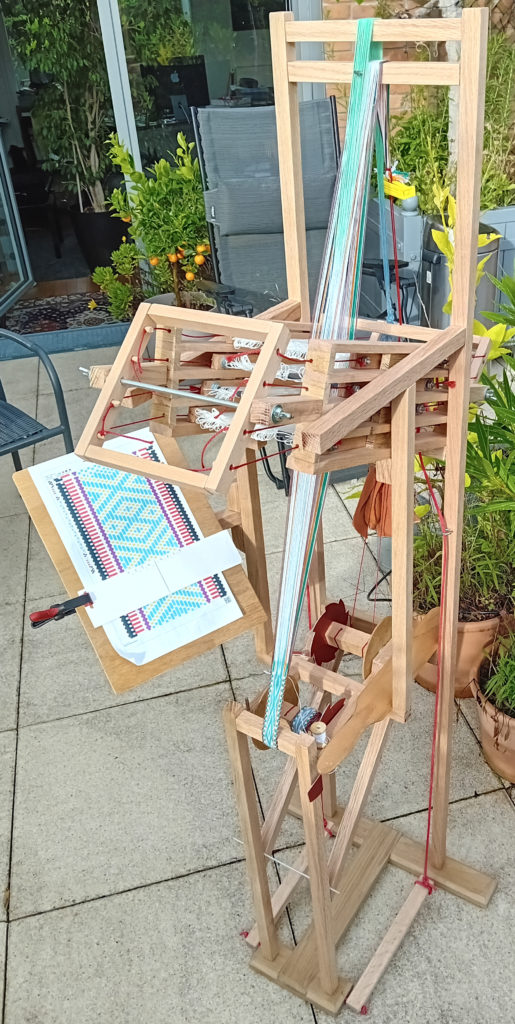
Simple idea may take time to emerge.
Up to now, in Seizenn, there were two ways to draw a baltic pattern.
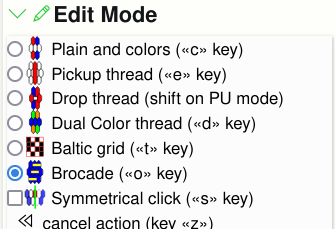
1) In the mode “ Edit an inkle loom pattern”, you can play with pickups and drops thread by thread. I will refer to this as the “realistic tool”.
2) In the mode “Edit a square pattern” you can create a grid (or block) chart. I will refer to this as the “Baltic grid” mode.
Grid charts are more common for Baltic pickup patterns, but they do not give a realistic preview of what the resulting band will look like.
As both are useful, I was asked several times to be able to switch from one to the other and back. I was quite reluctant because it would have been very difficult to program and it would have work in very few cases. The two tools work a very different way, you can draw pattern in one tool that would be impossible to create with the other (three color pattern, carpet pattern etc).
With the experience of what I did with tablet weaving tool (sulewasi mode), I tried an other way to fulfill the need, far simpler.
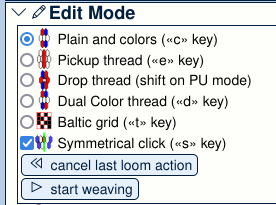
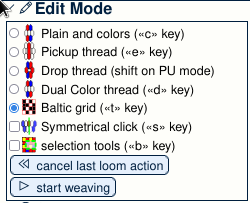
In the realistic tool, in the “Edit Mode” panel I just added a feature that allows you to select “baltic grid”. It will not work for 3-color pickup patterns, it’s just for simple 2-color baltic patterns.
For a 5 min video => https://www.youtube.com/watch?v=wQToadxlWv8
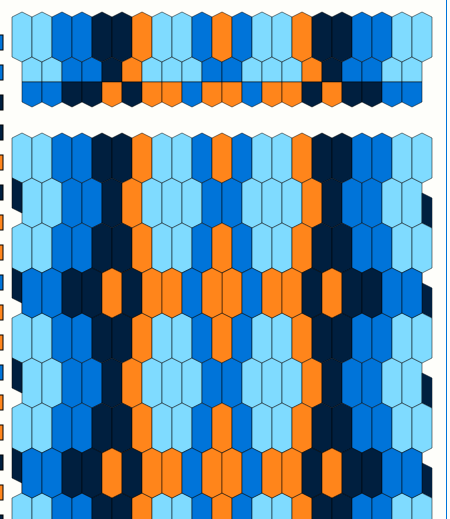
When you select it, you switch from
to 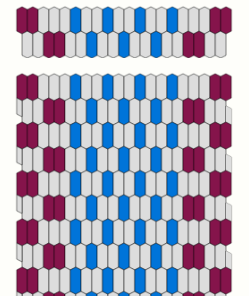

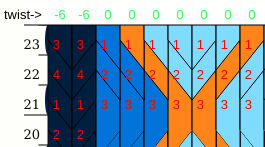
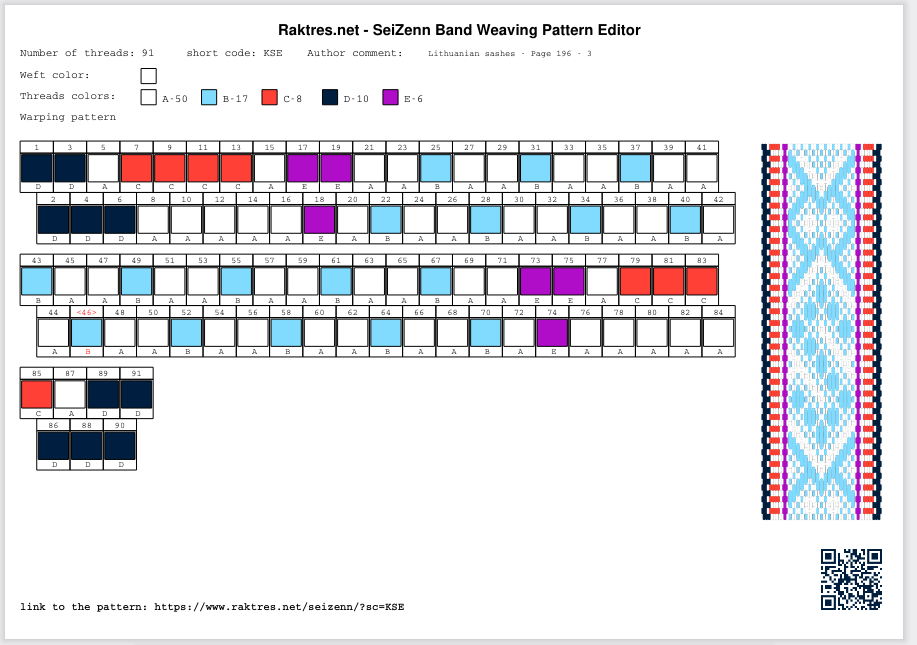
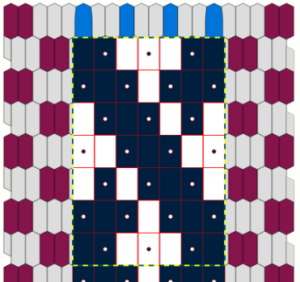
To use this mode, you need to adjust where the baltic grid begins on the left and where it ends on the right.
In the threading pattern, you see the first blue dot is done with the 11th thread, and the last one is done with 29th thread
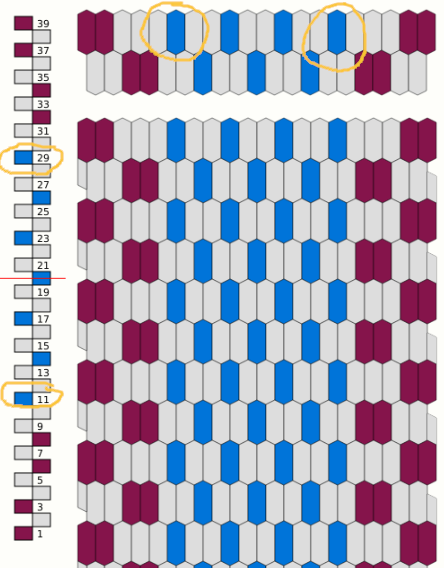
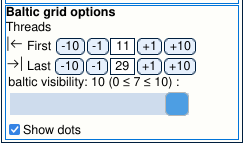
When you select “baltic grid”, new options become available in the “display options” panel.
In this panel, where it says “Threads” set the “first” and “last” values, 11 and 29 in this example.
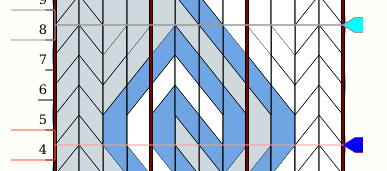
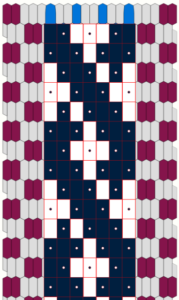
You can then click on the grid to create your pattern
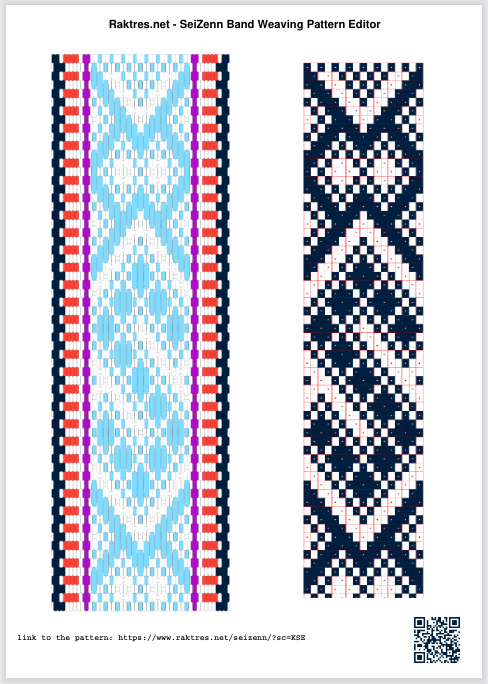
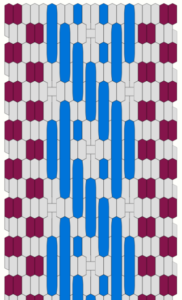
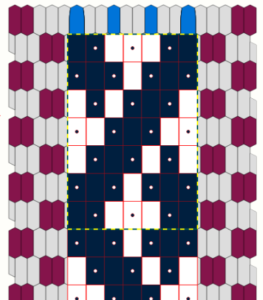
If you leave the “baltic mode”, you can see the result
In the “Display Option” panel you can also adjust opacity of the grid with the “baltic visibility” slider.
If you create a picture while you are in “baltic grid”, the grid pattern will be visible. Thus you can choose the pattern representation you want during weaving.
When you use ![]() or Sunna Heddle pattern
or Sunna Heddle pattern![]() , first and last parameters are set automatically.
, first and last parameters are set automatically.
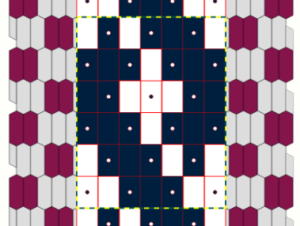
In the “Edit Mode” panel, when you select “baltic grid” mode, a “selection tools” checkbox appears. If you check this function, new buttons appear.
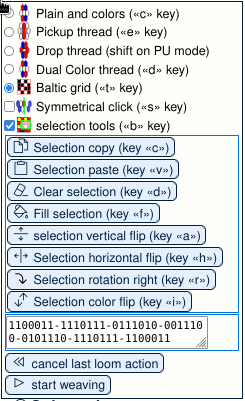
You can then select an area on the grid with you mouse. The area is surrounded with dashed blue and yellow line.
When an area is selected, you can act on it using the different buttons. For example you can flip it horizontally.
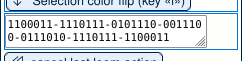
You can also copy and paste an area. With this selection, click on “selection copy”
Animation showing copy and paste
you may notice that a representation of the selected area appears on the tool panel.
You can then select the up-left point of the place you where you want to paste the pattern.
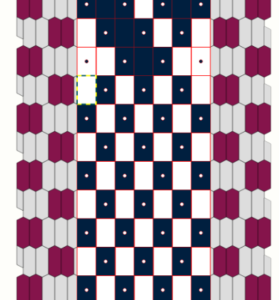
Then click on “selection paste”, you then get :
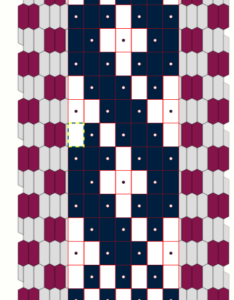
Animation showing how to copy a pattern from square tool.
There are limitations. For example it may not work if you have two baltic patterns side by side on the same band with a plain weave gap between the two. When you save a pattern, grid position is not saved. Of course will not work for 3-color patterns.
Hope this new mode will help you.
From Flaab I also bought a small rigid heddle. Back home, I wanted to try it on my weighted frame and chose to experiment 3 color patterns from Annie MacHale (https://www.taprootvideo.com/preview_class.jsf?iid=12&cid=2)
As the heddle is quite narrow, 31 threads, some modifications were needed. The first idea was
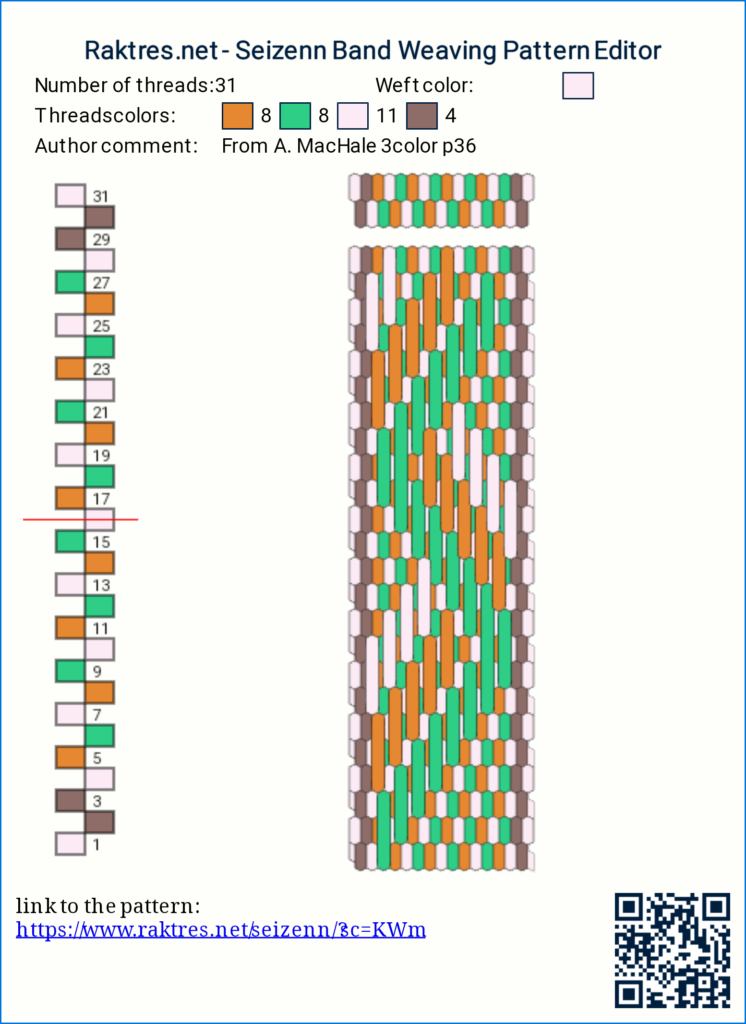
I then decided to modify it to get a 3 color pattern on both sides (and changed border threads)
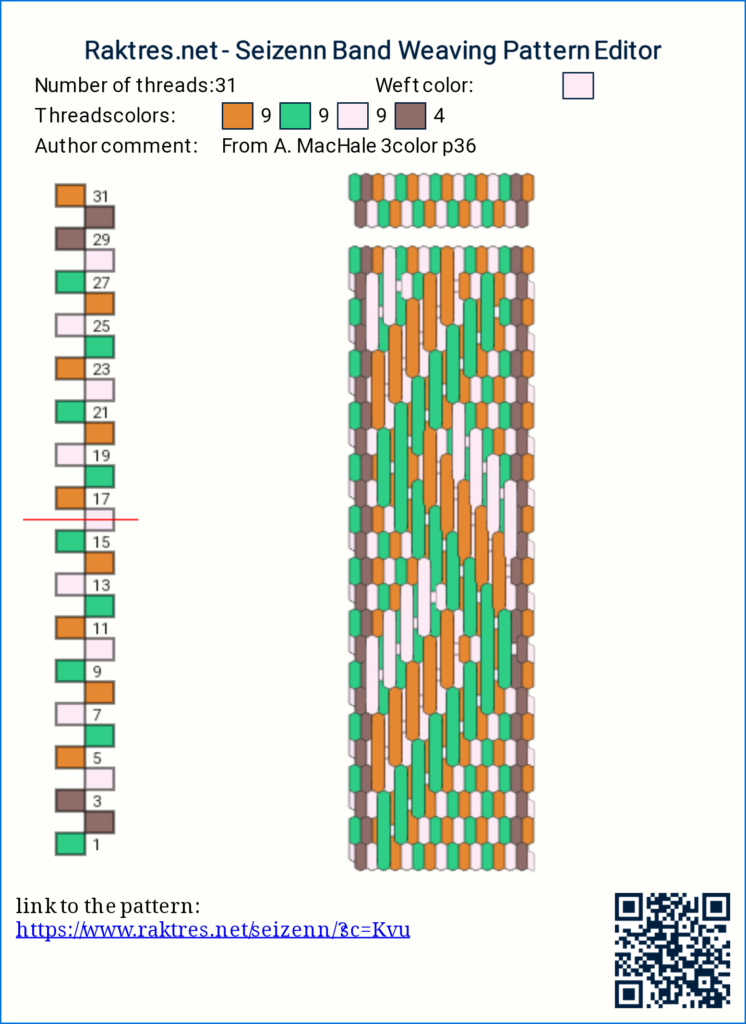
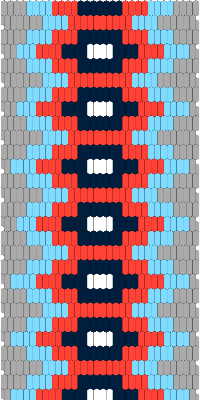
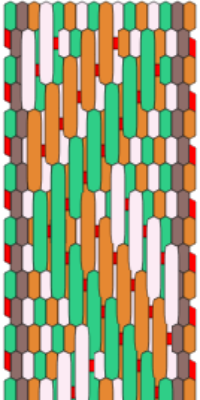
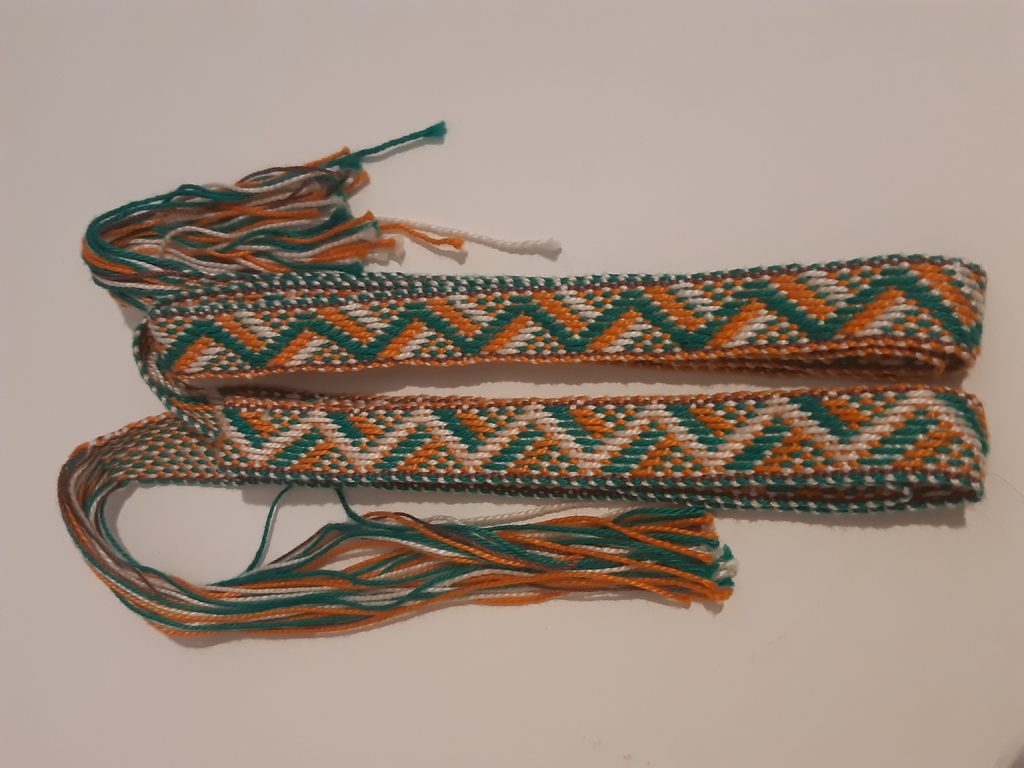
Modifications are very simple and not obvious with a white weft. To show them, here is the pattern with a red weft.
Everytime I pick up a thread, I drop the right next one. Very easy to do (that was my first 3color band) and result is nice.
Here is a picture of the setup 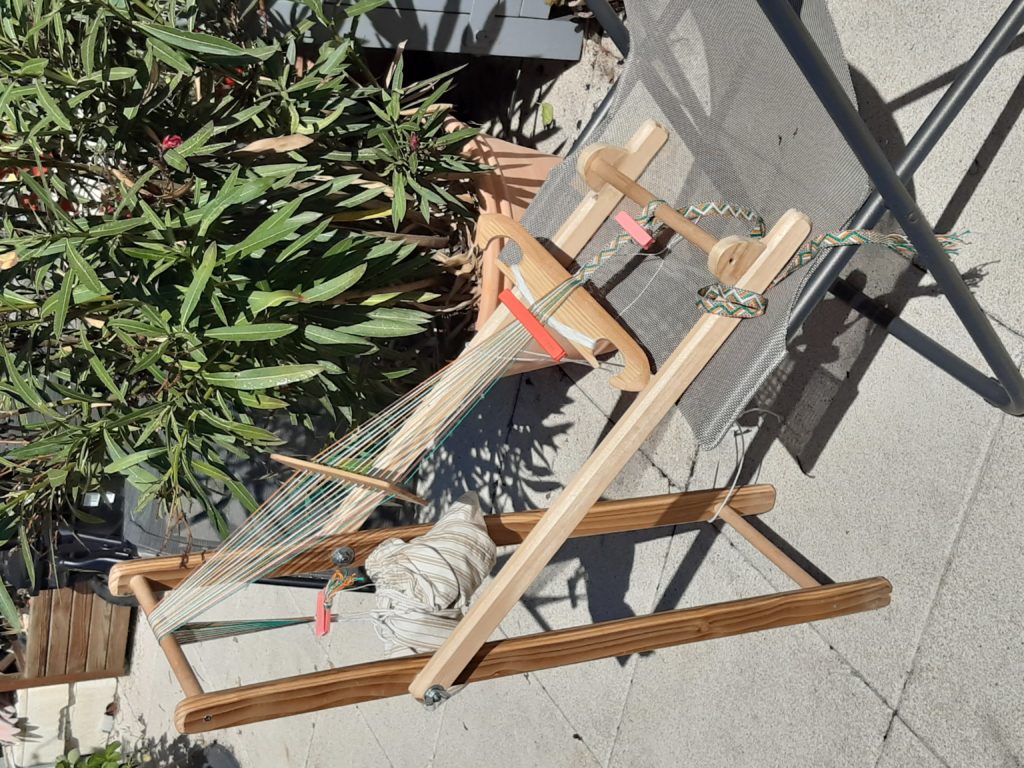
The two faces of the band.
Bonjour
Petite pause estivale.
J’ai commandé auprès de Flaab des cartes de tissage en bois que je recommande vivement.

Pour les utiliser partout, j’ai construit un petit chevalet qui peux être utilisé seul
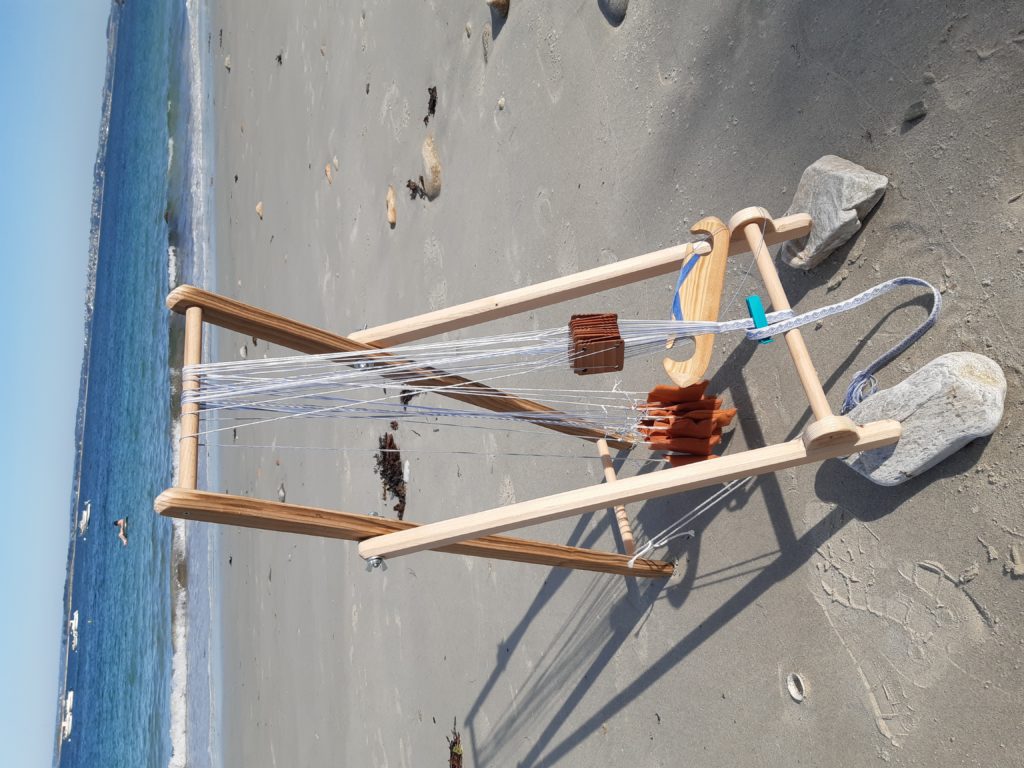
ou avec une ceinture.
Les poids sont faits avec des boulons de roue de voiture (80g) enveloppés dans des petits sacs en tissus.
J’ai choisi un motif simple assorti avec le lieu.